
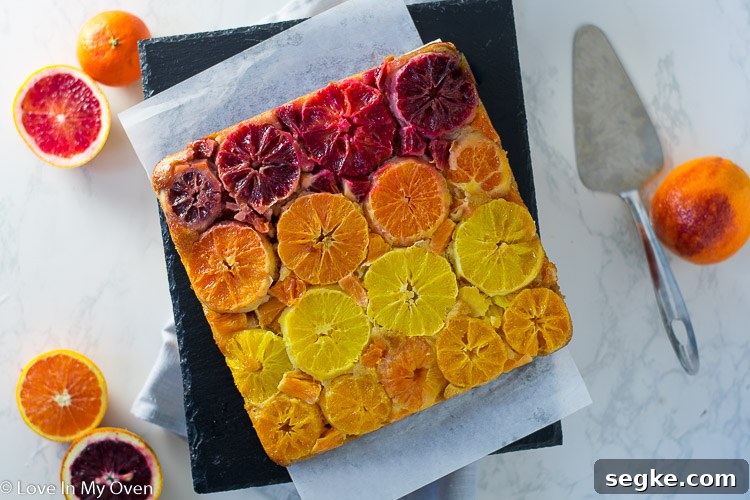
Impress your guests with an easy, bright citrus cake — an orange upside-down cake made with mixed oranges for a striking three-color effect. Celebrate citrus season with a moist, sticky, triple-orange upside-down cake.

I’m back with more citrus. Winter and early spring bring an abundance of sweet, juicy oranges, blood oranges, cara caras and mandarins — and this upside-down cake is a perfect way to enjoy them at their peak. It’s a simple cake that looks beautiful and tastes like sunshine: tender cake paired with a sweet, sticky glazed top (which becomes the decorative top after you invert the cake).
This orange upside-down cake is slightly dense yet moist, with a gentle citrus flavor in the crumb and glossy, caramelized orange slices on top. Using different varieties of oranges gives a lovely range of colors — deep red from blood oranges, pink from cara caras, bright orange from navels and small mandarin slices for contrast. The presentation looks like you spent hours decorating, while the recipe is straightforward.
What oranges do you use for this citrus upside-down cake?
Use whichever oranges you enjoy. Blood oranges, cara caras, navel oranges and mandarins all work beautifully. You can use one variety or mix two or three for a layered, colorful look. The number of oranges needed will vary by size; plan on 3–4 medium fruits to cover the bottom of an 8″ x 8″ pan.

Pan choice and preparation
I baked this in a standard 8″ x 8″ square baking pan, but a 9″ round cake pan will also work. The texture and bake time are similar either way; adjust by a few minutes and test with a toothpick inserted into the center — if it comes out clean, the cake is done.
Line the pan with a piece of parchment paper that overhangs the sides. This makes removing and flipping the cake much easier and helps preserve the glossy orange topping.
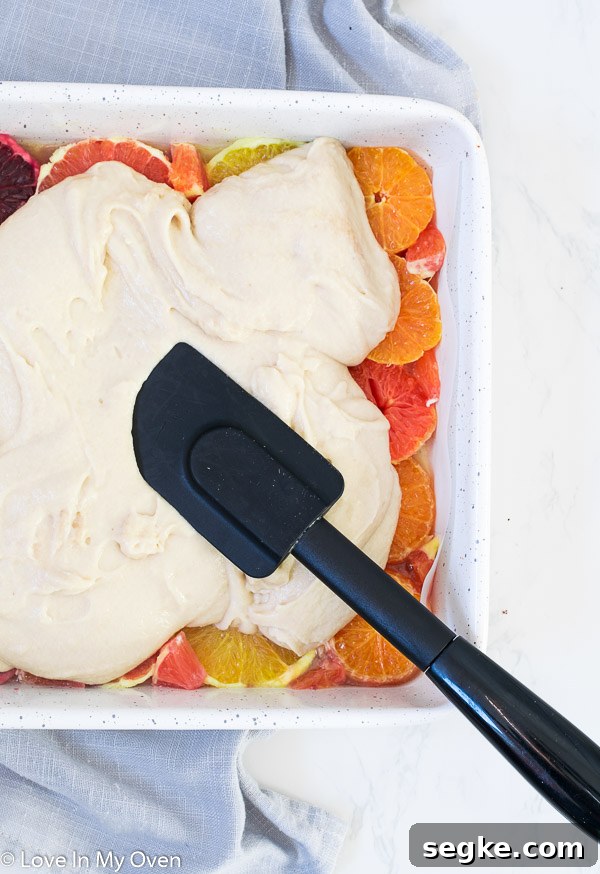
What if the orange slices don’t fit neatly?
It’s normal if whole rounds don’t fill the pan exactly. Fill gaps with small pieces of orange or overlapping slices — once the cake is baked and flipped, the arrangement reads as intentional and looks lovely. Small pieces baked into the glaze add texture and flavor without disrupting the presentation.

Tip for slicing and peeling oranges: Slice the oranges into rounds before peeling them. Keeping the fruit intact while cutting helps produce even 1/2″ slices. After slicing, use a small paring knife to remove the peel and as much of the white pith as possible — removing the pith reduces bitterness and improves the look of the slices.
Storage and serving
Store the cake in an airtight container at room temperature for 2–3 days. If you need to keep it longer, refrigerate for up to 4–5 days. Bring slices to room temperature before serving for the best texture. I don’t recommend freezing the finished, glazed cake — the glossy top and fresh fruit are best enjoyed fresh.
This cake makes a lovely dessert for brunches, tea, or a light finish to a dinner. Serve plain or with a dollop of whipped cream, a spoonful of crème fraîche, or a scoop of vanilla ice cream for extra indulgence.


Description
Impress guests with an easy citrus upside-down cake. It’s a single-layer cake that bakes with orange slices arranged in a glossy brown-sugar glaze. Flip it for a stunning, simple dessert that highlights seasonal citrus.
Ingredients
Glaze
- 3 tbsp unsalted butter, melted
- 3 tbsp brown sugar
Cake
- 3–4 oranges*, sliced into 1/2″ rounds, peel removed
- 1 1/2 cups all-purpose flour
- 1/2 tsp baking powder
- 1/2 tsp baking soda
- 1/4 tsp salt
- 1/3 cup unsalted butter, softened
- 1/2 cup brown sugar, packed
- 1/4 cup granulated sugar
- 1 large egg
- 1 tsp pure vanilla extract
- 1/2 cup milk**
- 1/4 cup orange juice
Instructions
- Preheat oven to 350°F (175°C). Line an 8″ x 8″ baking pan with parchment paper, leaving the paper to overhang the sides for easy removal.
- Combine the melted butter and brown sugar for the glaze, whisking until smooth. Pour this mixture evenly over the bottom of the prepared pan.
- Arrange the peeled orange slices, side by side, on top of the glaze. Fill any gaps with small pieces of orange so the surface is well covered.
- In a bowl, whisk together the flour, baking powder, baking soda and salt and set aside.
- In a mixer fitted with the paddle attachment (or with a handheld mixer), beat the softened butter with both sugars on medium-high until light and fluffy, about 1 minute. Add the egg and vanilla and mix until combined.
- With the mixer on low, add half of the dry ingredients and mix until just combined. Add the milk, then add the remaining dry ingredients and mix briefly on low. Stir in the orange juice until the batter is smooth and uniform.
- Pour the batter over the arranged oranges and spread gently with a spatula to level. Bake 40–45 minutes, checking at 40 minutes by inserting a toothpick into the center. If it comes out clean or with a few crumbs, the cake is ready.
- Cool the cake in the pan for 10–15 minutes. Run a knife around the edges if needed, then invert the cake onto a plate or cake stand. Remove the parchment paper and allow the cake to cool completely before slicing.
- Slice and serve. Leftovers keep in an airtight container for 2–3 days at room temperature or 4–5 days refrigerated.
Notes
*Use any combination of oranges you like. The number required depends on the size of the fruit — 3–4 medium oranges generally cover an 8″ x 8″ pan. Mixed varieties provide the most attractive color contrast.
**Use dairy or non-dairy milk (almond, oat or coconut) according to preference.
If the cake top looks uneven before inverting, trim a rounded top with a serrated knife so it flips evenly and the orange slices lay flat.
Additional tips
- Slice oranges before peeling to keep slices uniform and easy to handle.
- Remove as much white pith as possible to reduce bitterness and improve appearance.
- If you prefer a stronger orange flavor in the cake, add a teaspoon of orange zest to the batter.
- For a prettier glaze, gently brush a little warmed apricot jam over the oranges after the cake has cooled slightly but before serving.
Put some sunshine on your table with this simple, colorful orange upside-down cake — a great way to showcase seasonal citrus and impress friends and family with minimal effort.
Recipe details
- Author: Katherine | Love In My Oven
- Total time: about 1 hour
- Yield: 5–6 servings
- Prep time: 20 minutes
- Cook time: 40 minutes
- Category: cakes
- Method: baking
Did you make this recipe? Share your version and any changes you made — experimenting with different orange varieties and serving suggestions makes this cake your own.