
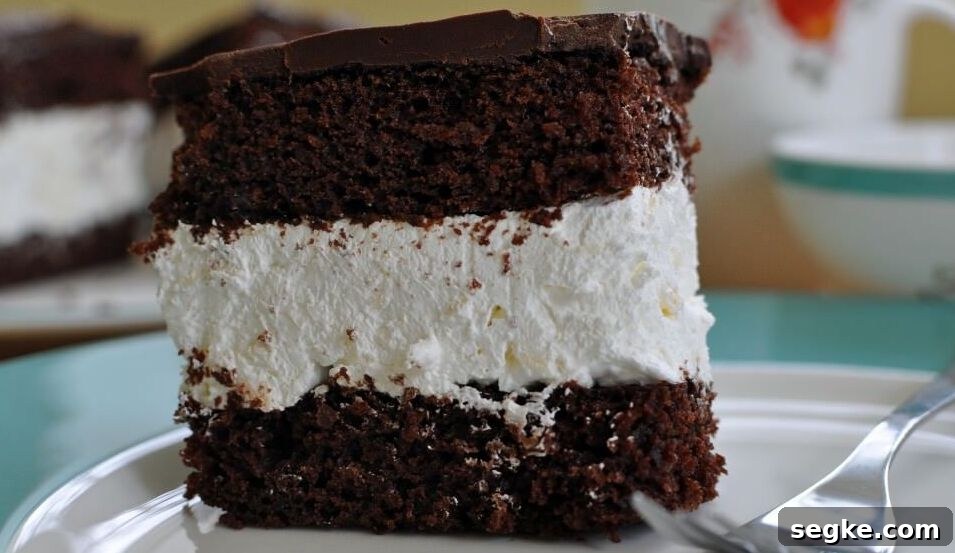
I have seen Swiss Roll Bar recipes in many Amish cookbooks. The name “Swiss roll” brings back nostalgic memories for me — a simple, chocolaty treat that many of us remember from childhood. While store-bought versions are convenient, making them at home yields a fresher, more satisfying result. These Amish Swiss Roll Bars are rich, moist, and filled with a creamy center, plus they’re sweetened in part with applesauce for added moisture and a subtle fruit note.
Homemade Swiss Roll Bars may remind you of classic snack cakes like Suzy Q’s or packaged Swiss rolls, but they beat the store-bought versions in flavor and texture every time. The chocolate layer is moist and tender, the filling is a light, sweet cream cheese and whipped topping mixture, and the glossy chocolate topping sets the whole bar into an irresistible treat. Yes, they take a bit of effort, but the payoff is worth it — especially when you want a nostalgic dessert made from scratch.
Below you’ll find clear ingredient lists and step-by-step instructions. I’ve also included a few practical tips — use parchment or wax paper to help remove the baked layers easily, chill the assembled bars before slicing for cleaner cuts, and warm the chocolate topping slowly so it melts smoothly.
🍰 Swiss Roll Bar Ingredients
- 2 cups all-purpose flour
- 1/2 cup unsweetened cocoa powder
- 1 teaspoon salt
- 1 teaspoon baking soda
- 2 eggs
- 1 1/2 cups granulated sugar
- 1/2 cup vegetable oil
- 2 cups applesauce
- Filling:
- 1 (16-ounce) container whipped topping (thawed)
- 1 (8-ounce) package cream cheese, softened
- 1 1/2 cups powdered sugar
- Topping:
- 1 package chocolate chips (about 10–12 ounces)
- 5 tablespoons butter
📋 Instructions
- Prepare the batter (BARS): Preheat the oven to 350°F (175°C). In a medium bowl, whisk together the flour, cocoa, salt, and baking soda until evenly combined.
- In a large bowl, beat the eggs and sugar until well blended. Add the vegetable oil and applesauce and mix thoroughly.
- Gradually add the dry ingredients to the wet mixture, stirring until just combined. Avoid overmixing to keep the bars tender.
- Divide the batter evenly between two greased or parchment-lined 10 x 15-inch cookie sheets or two 9 x 13-inch baking pans. If one pan is harder to remove, place a strip of parchment or wax paper under the batter to make removal easier.
- Bake at 350°F for 20–30 minutes, or until a toothpick inserted into the center comes out clean. Allow the cake layers to cool completely in their pans.
- Make the filling: In a mixing bowl, beat the softened cream cheese with the powdered sugar until smooth. Slowly fold in the whipped topping until the mixture is light and evenly blended.
- Spread the filling over one cooled cake layer, smoothing it into an even layer. Carefully remove the second cake layer from its pan and place it on top to form a sandwich.
- Prepare the topping: In a small saucepan, melt the butter over low heat. Remove from heat and add the chocolate chips, stirring until the chocolate is melted and the mixture is glossy and smooth.
- Pour and spread the chocolate topping over the assembled cake sandwich. Chill the finished cake in the refrigerator until the topping is set and the filling firms up—this makes slicing easier.
- Once chilled, cut into bars of your preferred size and serve. Store leftovers covered in the refrigerator for up to several days.
🍰 Tips and Variations
- Use parchment or wax paper under the batter to make removing the cake layers simple and prevent sticking.
- If you prefer a richer filling, increase the cream cheese slightly or substitute part of the whipped topping with homemade whipped cream stabilized with a little powdered sugar.
- For a fudge-like topping, add a teaspoon of corn syrup to the melted chocolate and butter for extra shine and smoothness.
- To serve smaller portions, cut thinner bars; for party-sized pieces, slice larger squares. Chilling before cutting ensures neat slices without smearing the filling.
This recipe takes a little time and patience, but the result is a nostalgic, homemade dessert that’s worth the effort. Whether you bake them for family, potlucks, or a cozy weekend treat, Amish Swiss Roll Bars offer a satisfying combination of chocolate, cream, and a tender cake layer that brings back memories and creates new ones.